 |
Back in August, we addressed the often-forgotten technique of visuoscopy in this column. As Marc and I began discussing topics for this month, I realized there are a number of tests we all learned in optometry school that we may not use on a daily basis but deserve a fresh look. One of these, which gets used quite frequently if you practice in pediatric or vision therapy areas but may be used less in primary care, is the Worth 4-dot test. As it is one of my favorites, I thought the time was ripe for a review!
Running the Test
 |
|
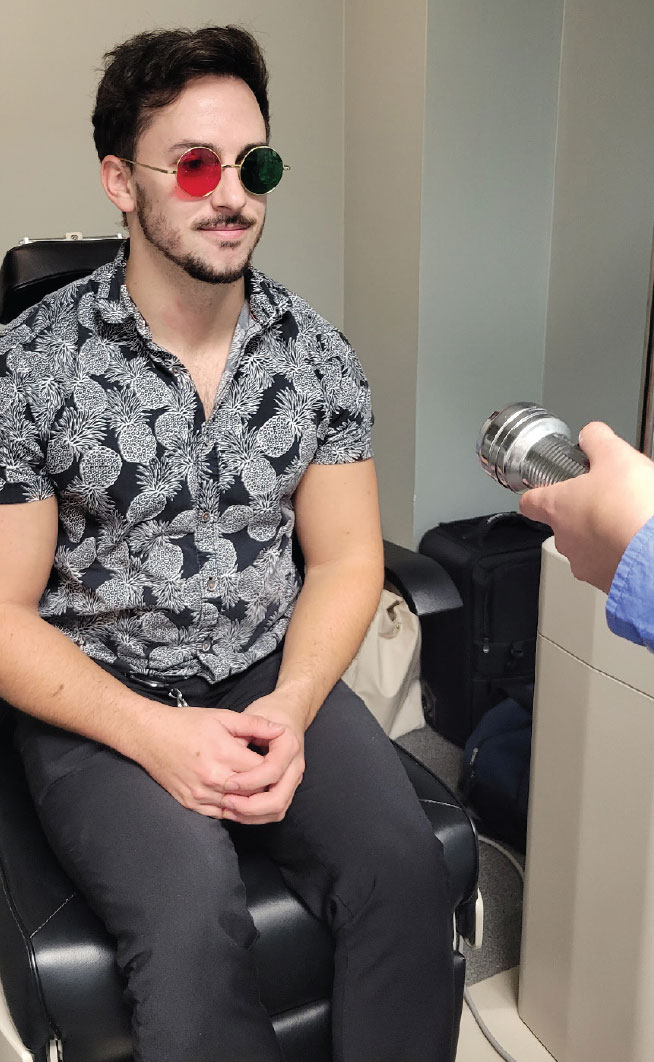
Fig. 1. A patient with red/green glasses to administer the test. Click image to enlarge. |
The Worth 4-dot test is so simple to administer that it’s easy to forget how much information it can provide. Before diving into the interpretation, let’s look at how the test is run. The equipment is minimal—just the Worth 4-dot flashlight (the older version) or transilluminator attachment (newer) and a pair of red/green glasses (Figure 1). You may still have these lying around and not realize it, since most of us got them in school!
To administer the test itself, simply have the patient put the red/green glasses on with the red lens over the right eye (over their current Rx if needed) and then show them the illuminated Worth 4-dot target. I like to emphasize to my students putting the red/green glasses on first; one of my more embarrassing mistakes in early residency was accidentally showing a child the target without them—of course they saw all four dots (oops)! The target itself should be held so that the white dot is either on the top or the bottom, with the red dot opposite and the two green dots on the sides. This allows easy interpretation of diplopia, should it occur.
Once setup is complete, ask the patient to tell you (or to draw) what they see—how many dots are there? What color(s) are they? The test is administered at a variety of distances, so it is easiest to begin at 40cm and back away from there, asking the patient again to report what they see at about three feet and again at six feet. In addition to testing at multiple distances, the Worth 4-dot can also be administered in both full or dim room illumination; this also becomes important in the interpretation of the results.
Interpretation
Now that we know how to set up and run the Worth 4-dot test, why are we doing it? What are we looking for? As mentioned, the Worth 4-dot can tell us many things, but most practitioners use it for a gross assessment of fusion. Your patient will respond in one of several ways; looking at the possible responses will make the results easy to understand.
- Your patient reports seeing four dots: one red, two green and one yellow. Great! This is the “normal” response. When the patient is wearing red/green glasses with the red lens over the right eye, the patient will see the red dot with their right eye and the green dots with their left. The white dot will assume whichever color filter the patient looks through; it will appear red to the right eye and green to the left. If both eyes are seeing the white dot simultaneously, the patient will report some version of a blend of red and green, usually described as “yellowish.” This is an example of the phenomenon of luster, which is a type of second-degree fusion.
- Your patient reports seeing either two red dots or three green dots. In this case, one of the eyes isn’t getting the proper input to allow the patient to see four dots. They are suppressing one eye’s information, and you can easily determine which by remembering which eye sees which dots. If the patient reports seeing two red dots, they are suppressing their left eye; if they see three green dots, they are suppressing their right.
- Your patient reports seeing five dots: two red and three green. In this situation, the patient is experiencing diplopia. Both eyes are getting information but no fusion is happening. Ask the patient to tell you where the red dots lie—are they on the right or the left of the vertical center line? Or are they above or below the horizontal? The location of the dots will tell you whether the patient has an eso, exo or hyper posture. If the red dots appear to the right of vertical center, you have an uncrossed diplopia, representing an eso deviation. If the red dots appear to the left, this is crossed diplopia, or exo. We often already know this from cover testing, but verification is always nice! In addition, fluctuation can be seen easily if the patient reports that the dots move.
So, what about testing with different distances and light levels? These aspects provide key information about the patient’s stamina and suppression level (if noted). Let’s address each separately.
Varying the distance. By moving from your starting point of 40cm to three feet and then six feet, the overall retinal angle that the target subtends gets smaller. By showing a progressively smaller target, we can determine roughly how large an area of suppression exists if one is found at all. We can also determine whether a patient is capable of maintaining fusion in a dynamic setting. Although many “official” direction sets say to check at each of the three distances individually, I prefer to move in a more continuous fashion. I hold the target at 40cm, give the instructions and then tell the patient to report any changes as I slowly move away. In this manner, you can pinpoint exactly where in space the patient begins to suppress, picks up fusion, goes double and so on.
Varying the light levels. By changing the room lights from full to dim, we can get a sense of how deep a suppression the patient is experiencing. While there is no need to repeat the test in dim illumination if the results are normal, if the patient suppresses in full room lighting, we need to know whether it is a shallow or a deep suppression, especially if we plan to refer them for vision therapy.
 |
|
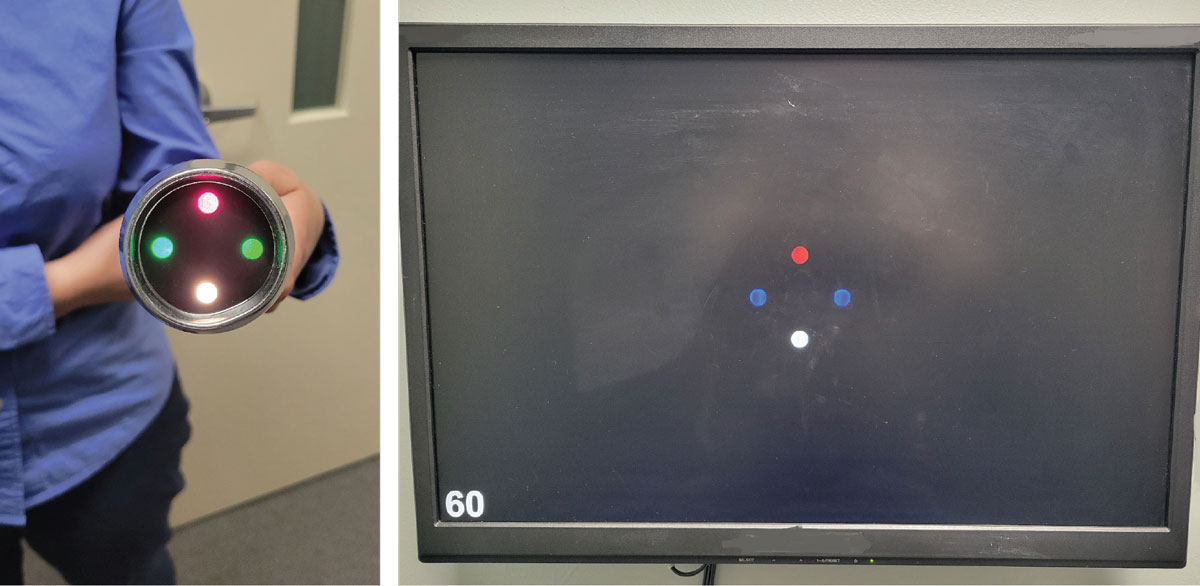
Fig. 2. The traditional Worth 4-dot (left) and a newer digital version (right). Click image to enlarge. |
The general rule I give to my students is this: The more unnatural the environment, the deeper the suppression. If the patient suppresses with the lights on but the act of turning them off causes the suppression to break, they have a relatively shallow suppression. That’s usually easier to handle in therapy than a deep suppression, which would be indicated if the patient continues to report only two or three dots in dim lighting.
What else can we assess with the Worth 4-dot? Although we don’t generally use it for this, I suppose we could get a gross assessment of color vision. For example, if the patient is unable to see a difference in the dots’ colors. The other use in the vision therapy world is in determining whether a patient is showing anomalous projection. If that phrase didn’t make you cringe, you probably already do vision therapy! If it did, well… we’ll save that topic for another day!
Dr. Taub is a professor and co-supervisor of the Vision Therapy and Pediatrics residency at Southern College of Optometry (SCO) in Memphis. He specializes in vision therapy, pediatrics and brain injury. Dr. Schnell is an associate professor at SCO and teaches courses on ocular motility and vision therapy. She works in the pediatric and vision therapy clinics and is co-supervisor of the Vision Therapy and Pediatrics residency. Her clinical interests include infant and toddler eye care, vision therapy, visual development and the treatment and management of special populations. They have no financial interests to disclose.