COVID-19 has all of us re-evaluating our office’s safety equipment and sanitization routines—now while handling urgent cases during stay-at-home orders and ongoing once offices are open for business as usual. I, for one, tried ordering breath shields for my office slit lamps, but after four weeks, I’m still waiting for updates. So, I decided to try my hand at making a shield on my own. If you have even rudimentary skills and a few tools, it’s easy. Here’s how you can make some for your office.
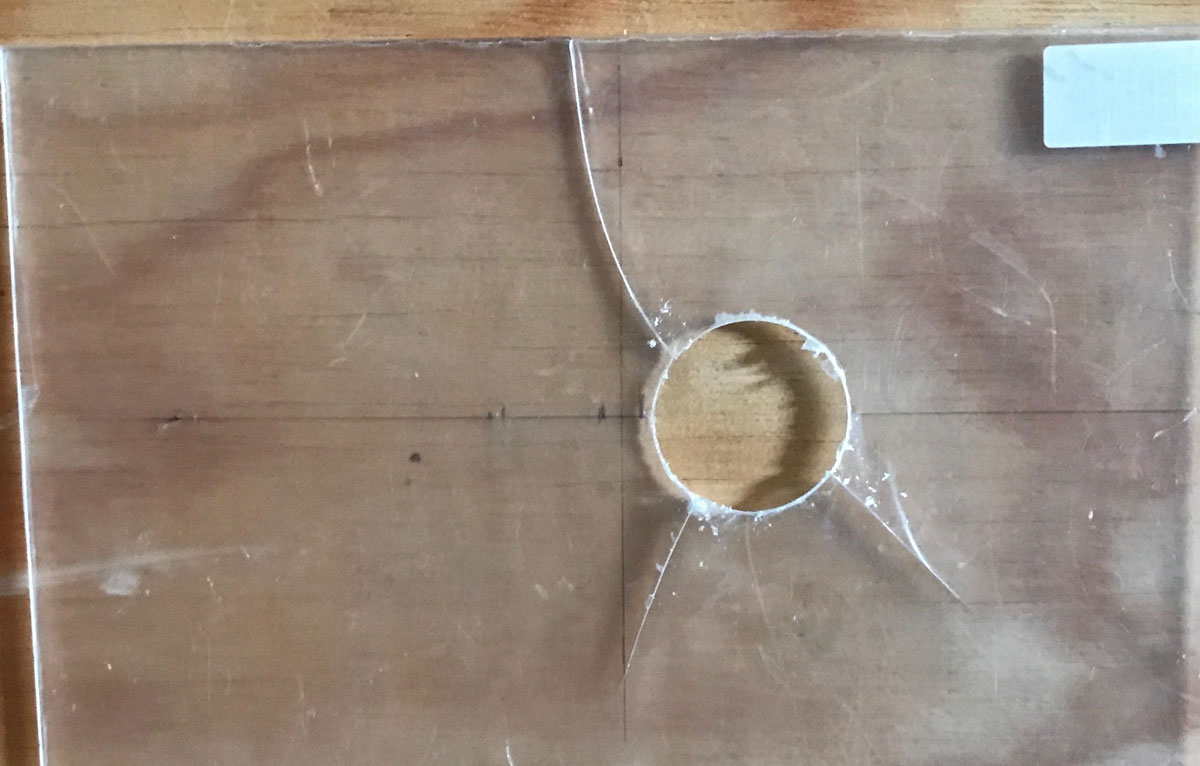 |
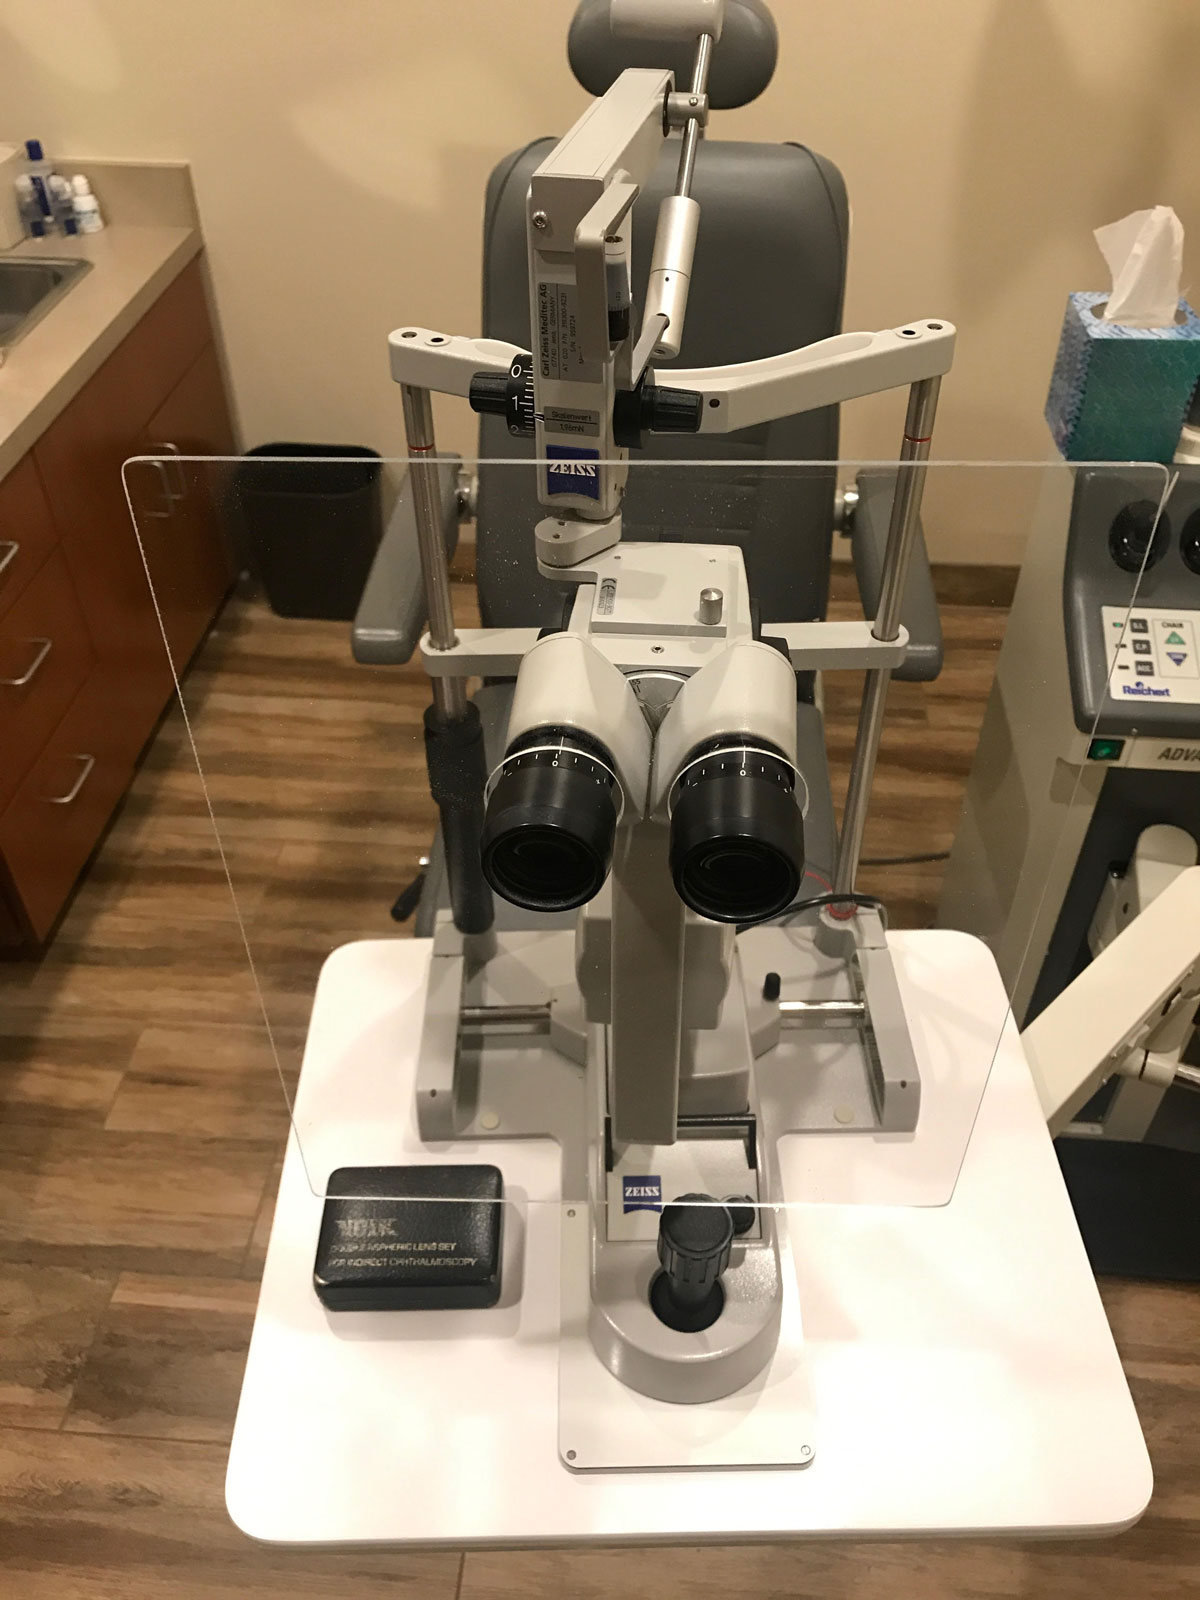
| Plexiglass is brittle and cracks easily, so exercise care. It also melts easily, gumming up tools and creating ragged holes. Click image to enlarge. |
Materials and Prep
The first thing you need is a sheet of plexiglass, which you buy in various sizes at your local home improvement or craft store for a few dollars. This is the same material we all know from older design contact lenses: polymethyl methacrylate (PMMA).
Plexiglass is the generic term for an acrylic sheet, while Plexiglas (with only one “s”) is the brand name. Other brand names include Acrylite, Astariglas, Crylus, Lucite and Perspex.
The majority of commercially available slit lamp shields are relatively small and may not provide an adequate barrier to comfort you, the patient or your staff. I chose to purchase acrylic sheets that were 11”x14” and ⅛” thick. You can use smaller and thinner material, but the thinner sheets are more prone to breakage, and a smaller size may provide less protection.
The plexiglass sheets come with a protective plastic film cover on both sides to prevent scratches. These provide an excellent overlay on which to sketch out a pattern with a pen. Leave this film in place until fabrication is completed.
Hold the plexiglass sheet up to your slit lamp when marking the vertical placement for the oculars to ensure adequate clearance for the joystick’s full range of motion, tonometer, camera or other attachments you may have. Obviously, different brands of slit lamps and their features and attachments may require modifications to the basic design, including both hole placement and size.
Special tools are available for cutting acrylic material, but with care, you can also use metal drill bits and a wood hole saw. To reduce the risk of problems, work slowly, keep the material cool with water and use adequate support underneath the material.
Step-by-step Instructions
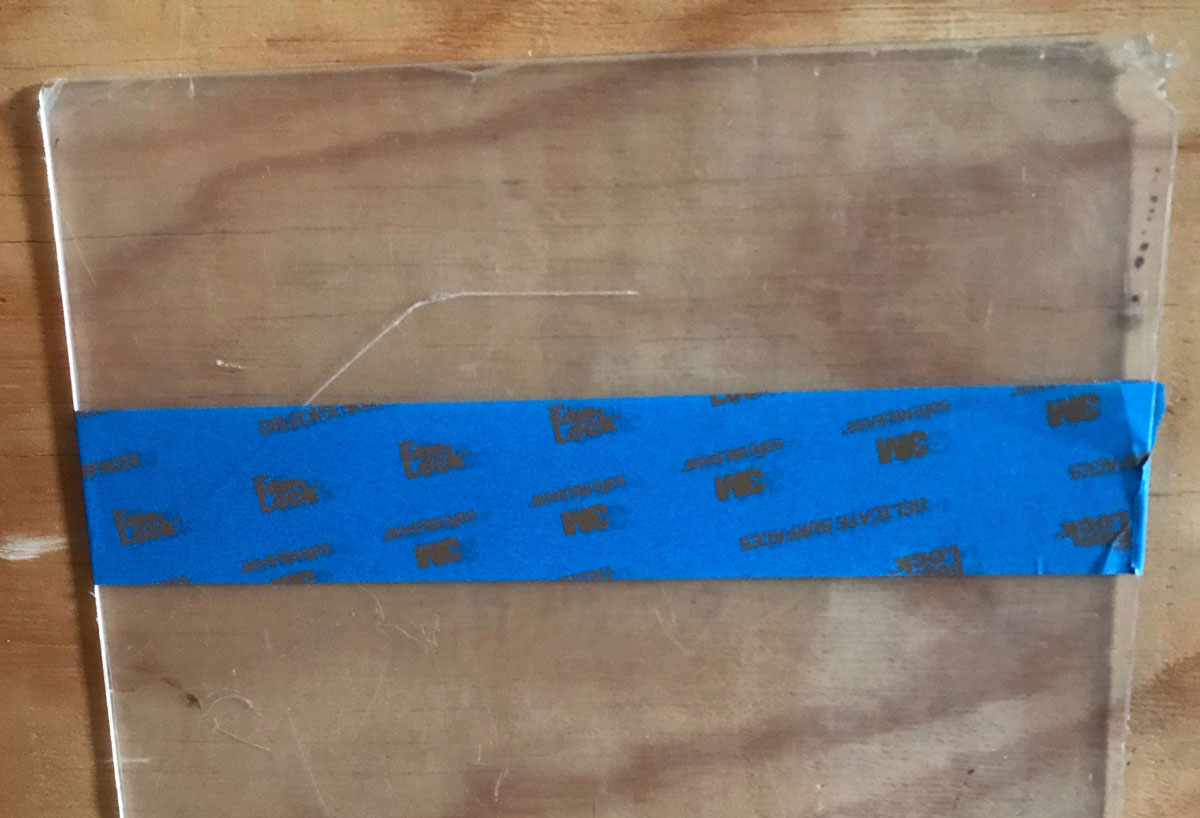 |
| 1. To reduce the risk of breakage, wrap several layers of 2” painter’s tape around the plexiglass sheet at the height determined for the oculars. Click image to enlarge. |
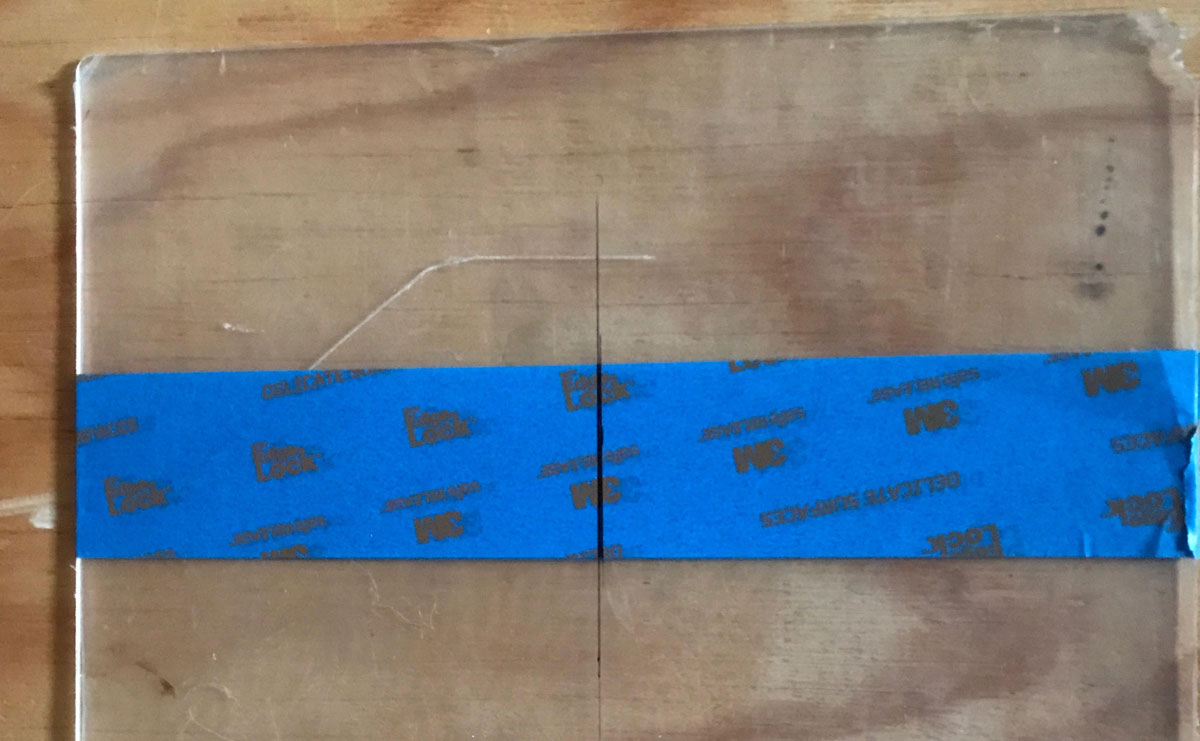 |
| 2. Mark a line bisecting the plexiglass sheet along its long axis (vertically) into two equal rectangles. Click image to enlarge. |
 |
| 3. Draw another line perpendicular to the bisecting line at the predetermined ocular height (horizontally). Click image to enlarge. |
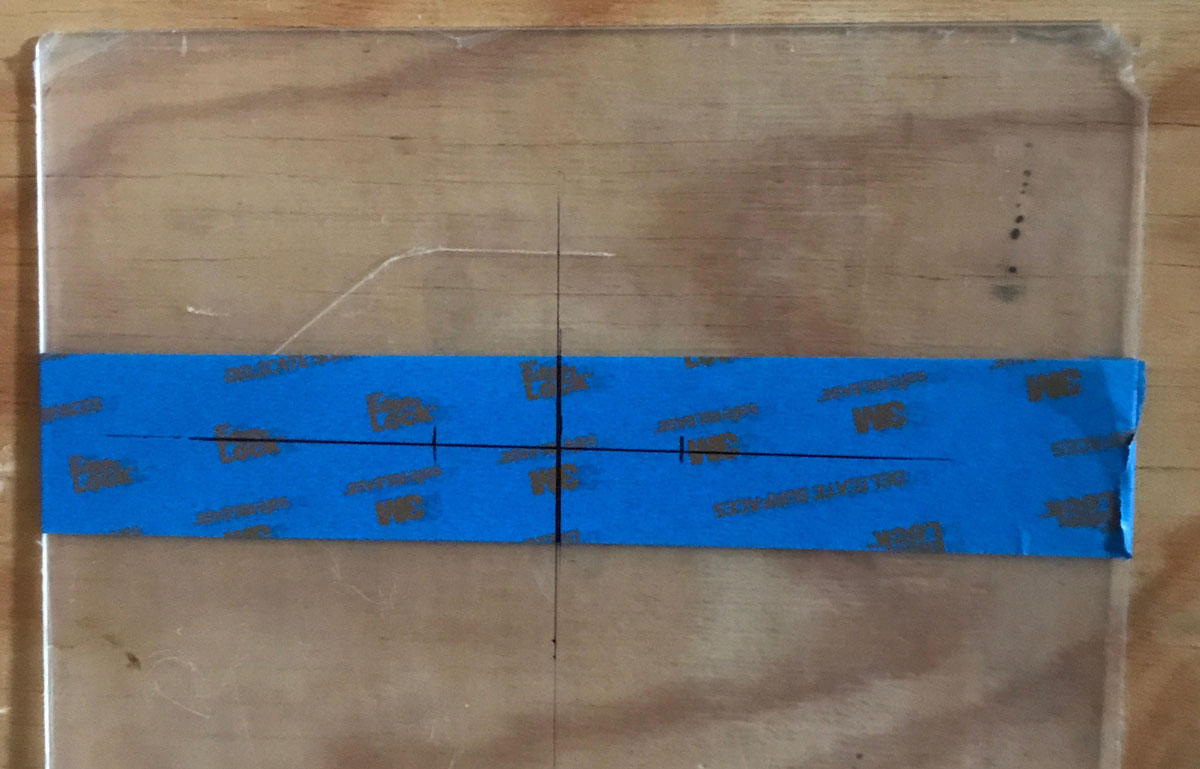 |
| 4. Mark your pupillary distance (PD) along the horizontal line previously drawn, centered on the vertical line. If more than one person uses the slit lamp, take the average of the users’ PD, or use 65mm. Click image to enlarge. |
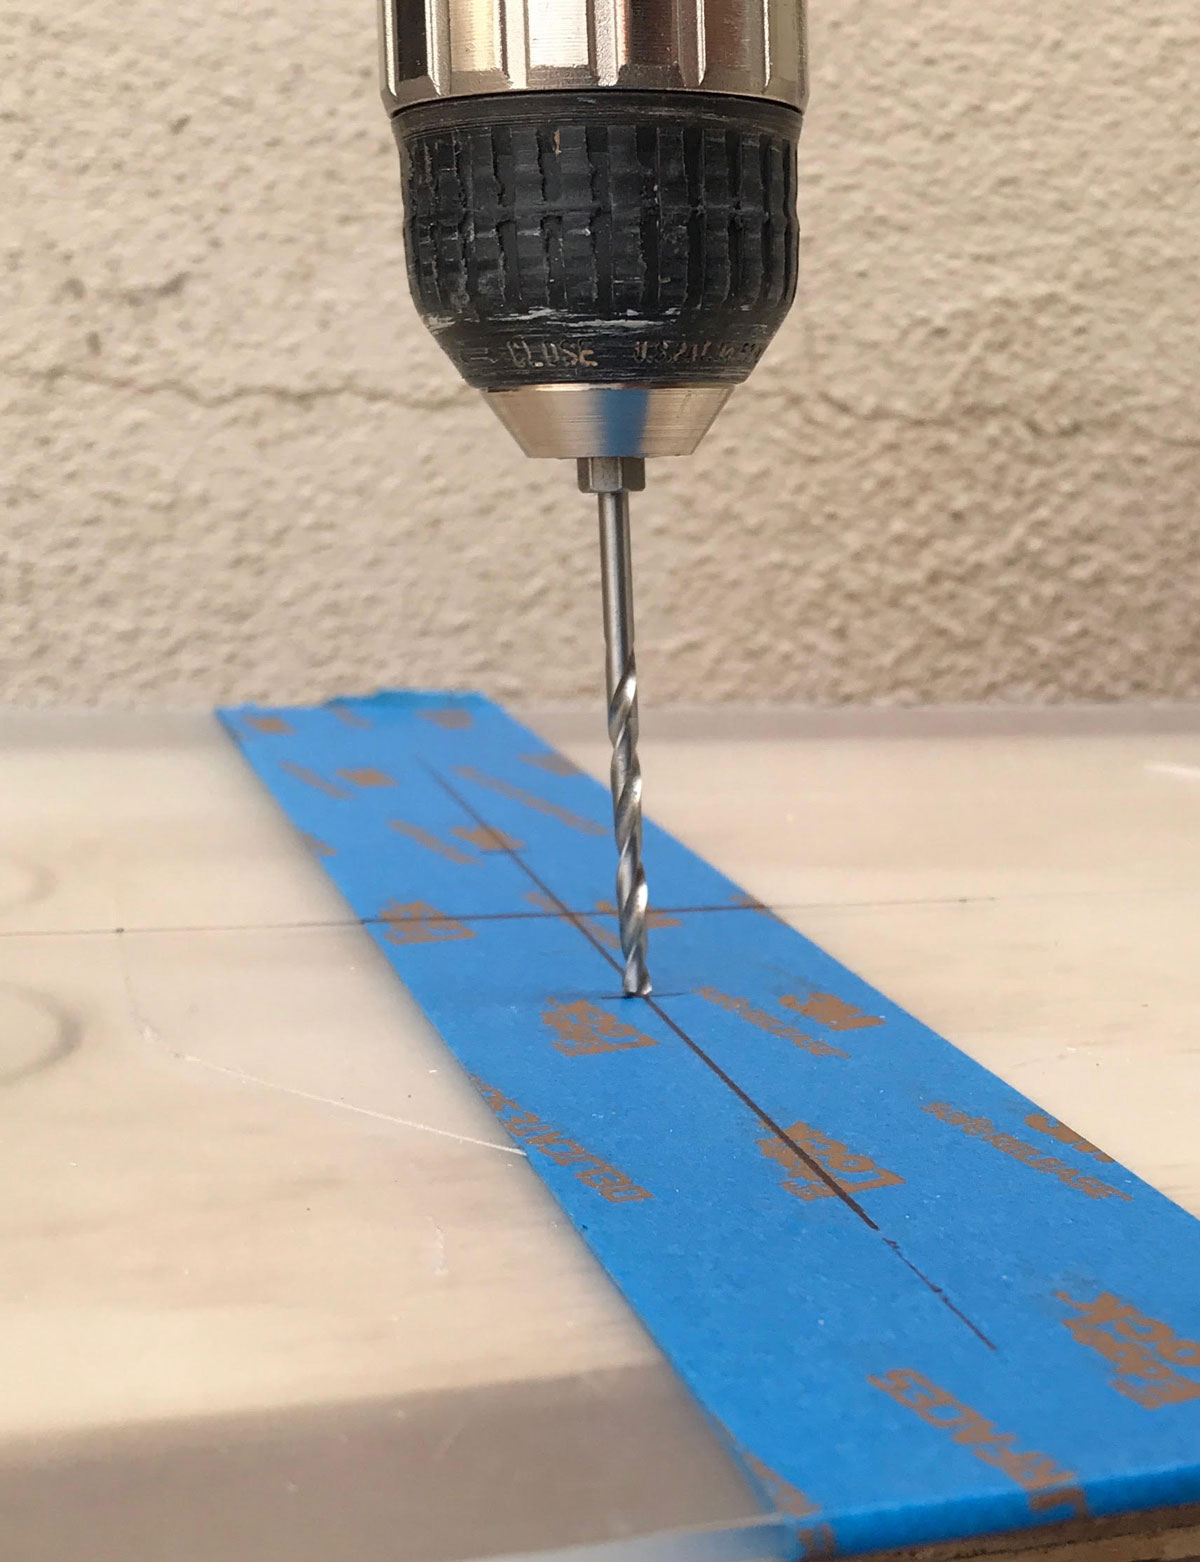 |
| 5. Drill two small pilot holes at the marked PD. Click image to enlarge. |
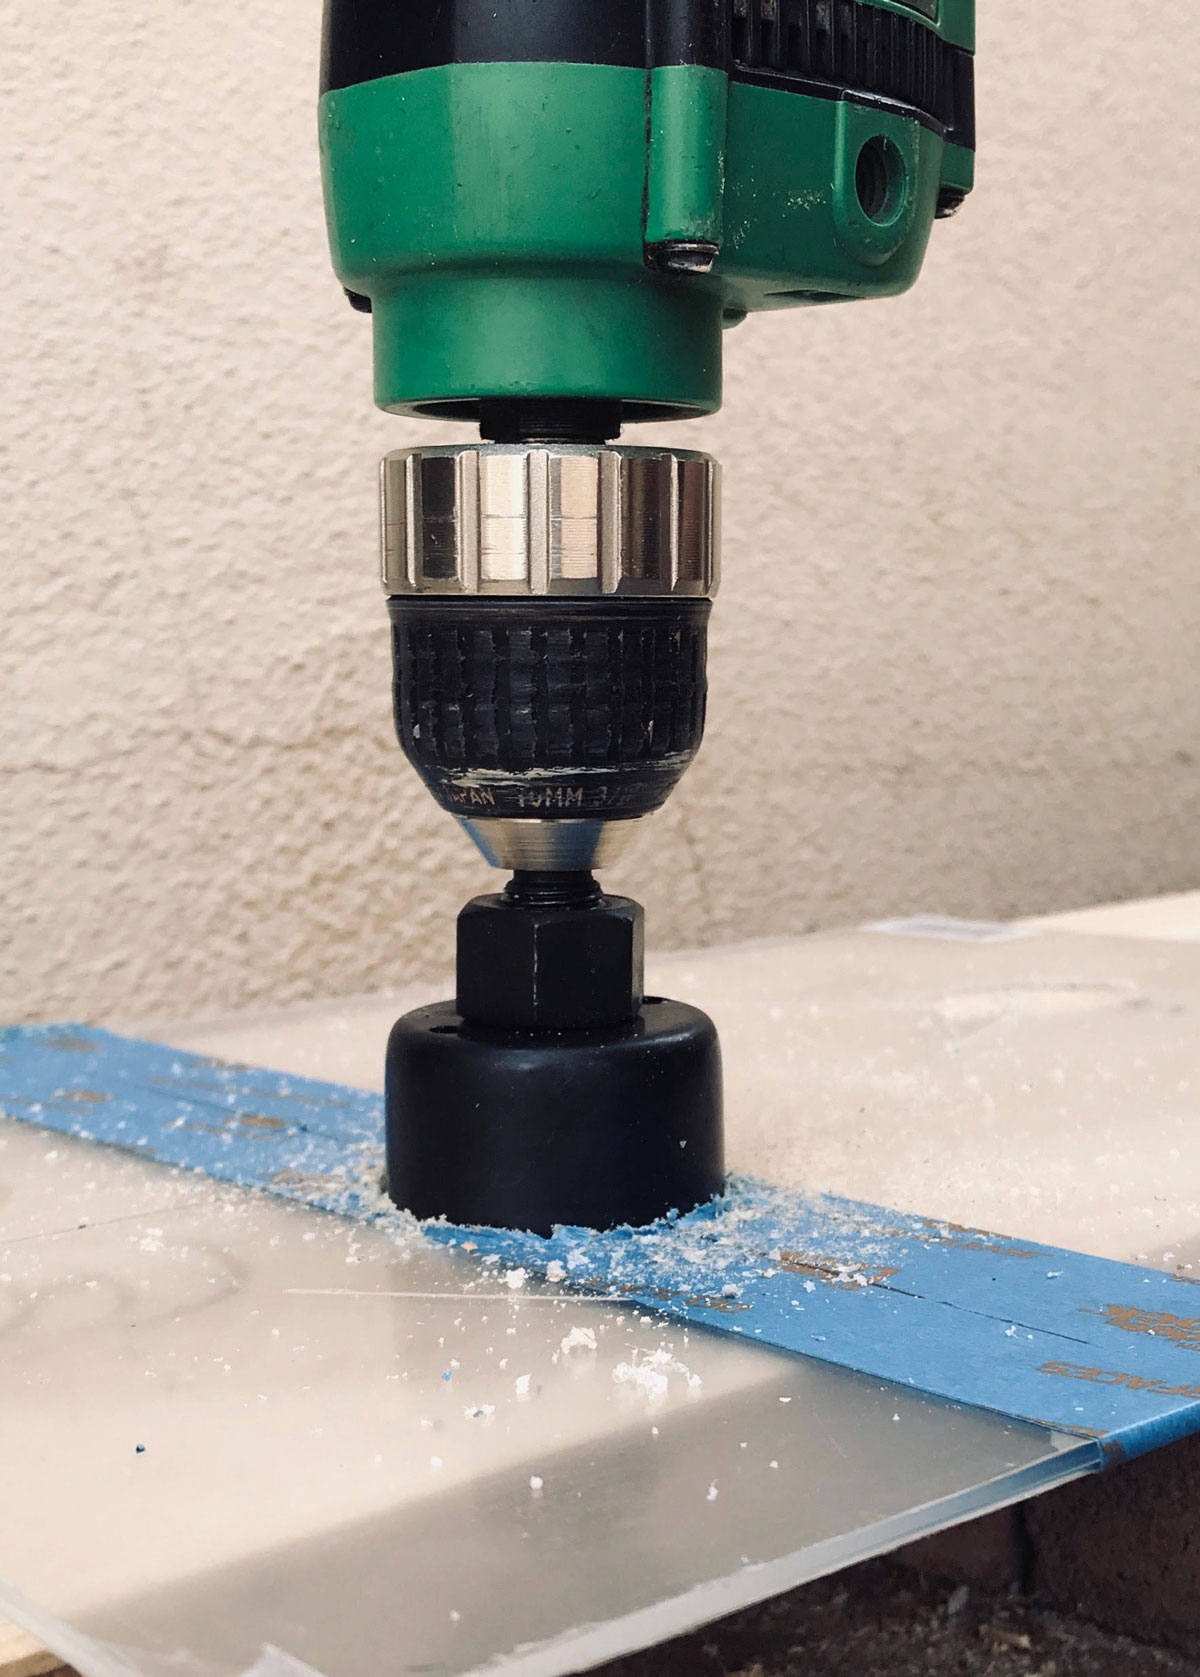 |
| 6. Using a 1-3/4” hole saw, with plenty of water for cooling, cut two holes centered on the pilot holes. Click image to enlarge. |
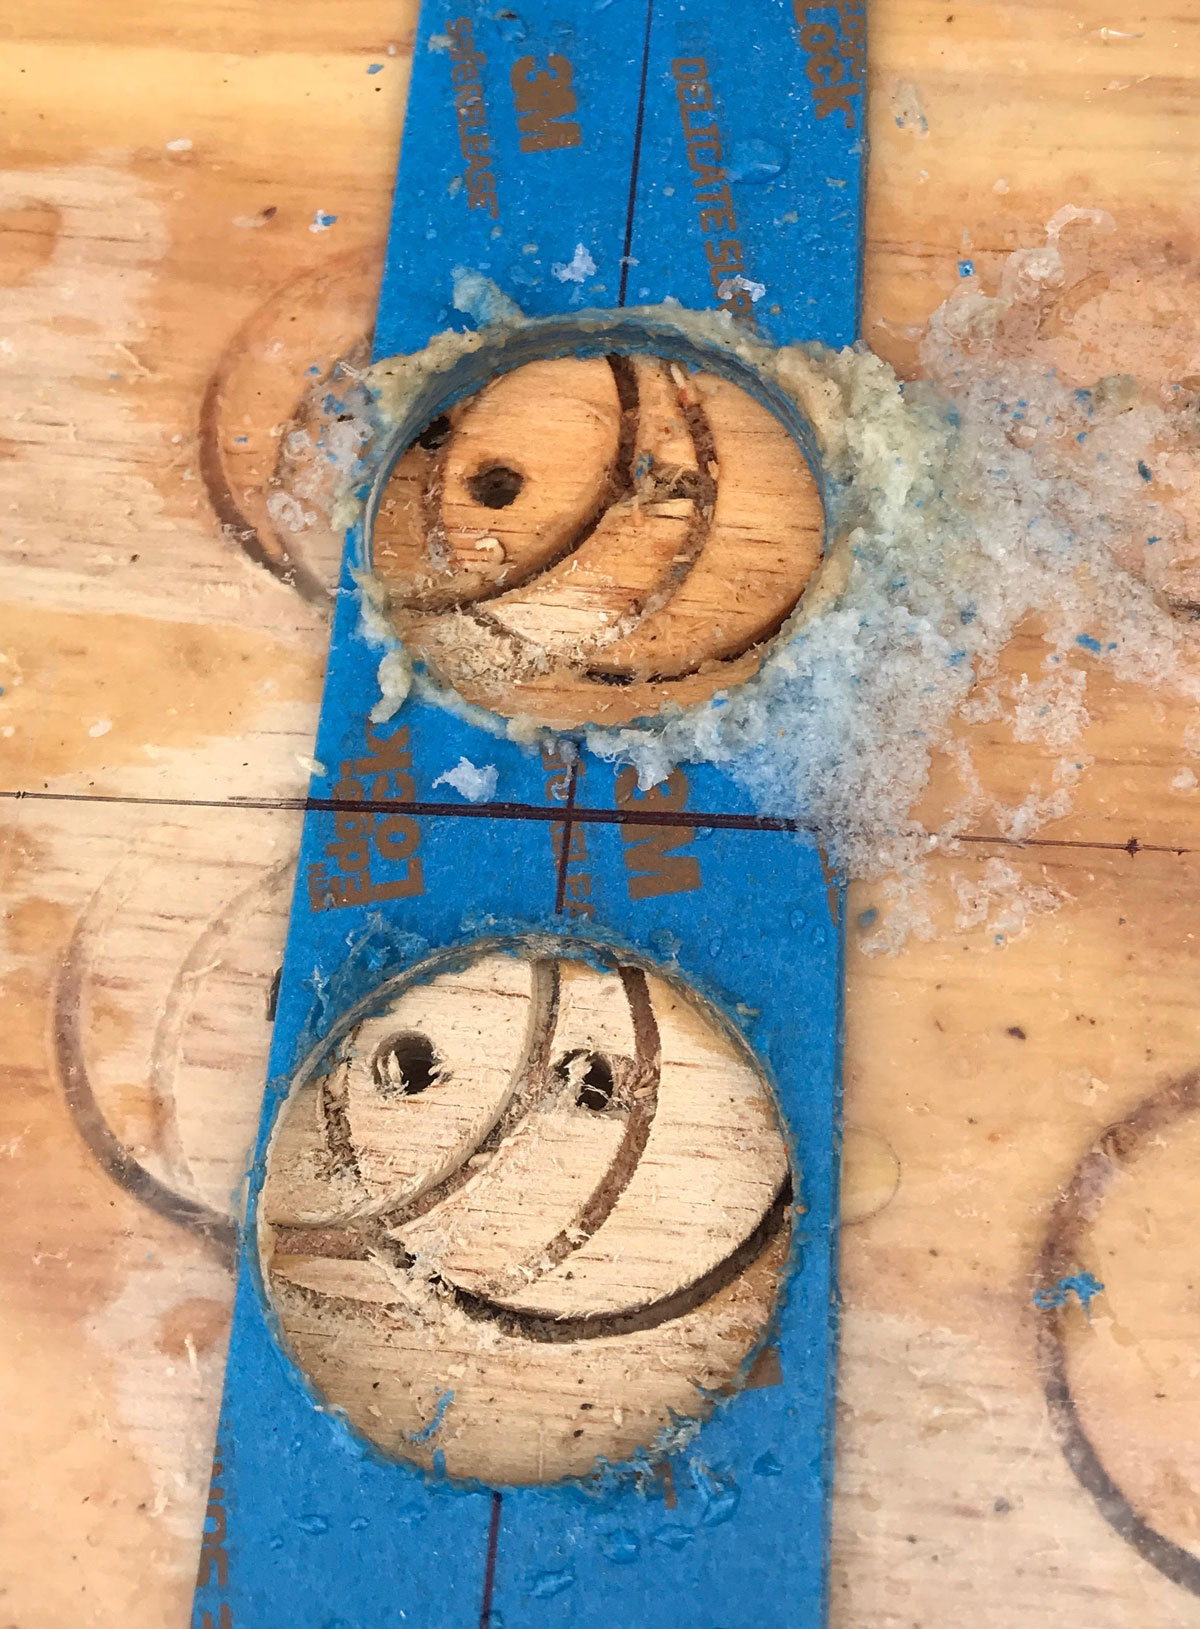 |
| 7. Smooth the edges of the holes using sandpaper. Round the four corners of the sheet with a file, then sandpaper. Click image to enlarge. |
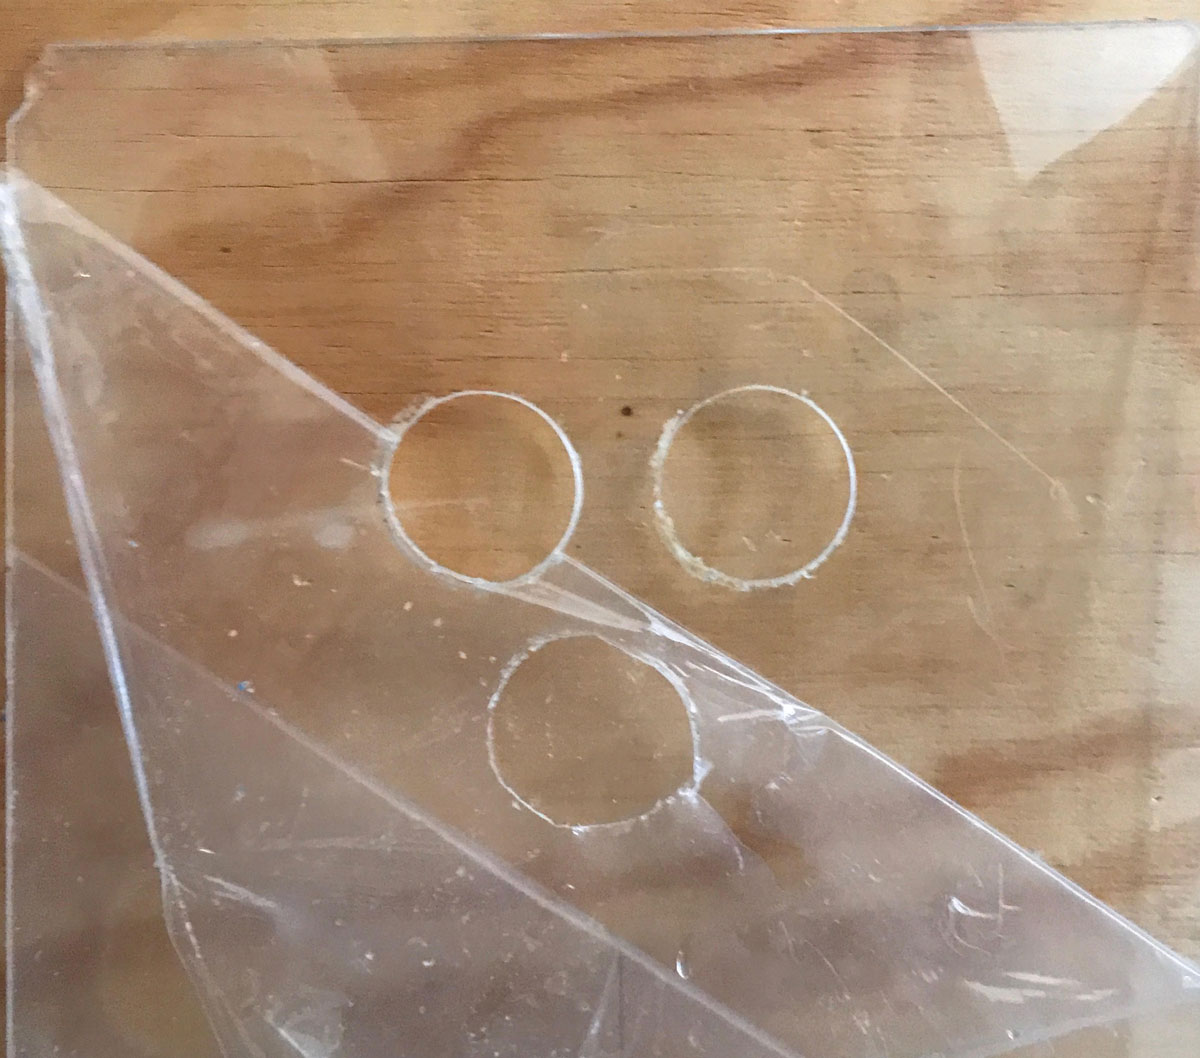 |
| 8. Peel away the protective film. Click image to enlarge. |
 |
| Project complete! Click image to enlarge. |
Dr. Lucas founded Focused on Eyes in Chandler, AZ, in 2007 as a leading family-oriented eye center. She also serves as a supplemental consultant at the Mayo Clinic in Scottsdale, AZ.
